In my previous article , I have discussed in detail step by step guide to buy hosting .Creating an website with your hosting is as easy as buying hosting.In this article I show you you how to create your first website without single line of coding.
There are several ways to create a website without single line of coding but impressive look with customization in website design requires some amount of coding knowledge .Don’t worry, in this article i will not use single line of coding to built our demo website.
As i mentioned in previous paragraph there are several ways to create website but the most prefered way is to create with
i) Drag & drop website builder. hostpad.org provides drag and drop website builder named as rvsite web builder.
ii) Using content managent system like wordpress : wordpress is most commonly used content management system all over the world and powerfull too.Other than wordpress there are lots of popular open source php software to build your website like drupal, joomla etc.
In this article i use wordpress because i think creating with wordpress is much more easy than creating with drag and drop site builder.There are lots of free resource guides , themes , plugin is available for wordpress.
Now let’s begin our journey:
In creating website, first thing you have to do, to map your web server with domain name.In this article , i will not discuss about how to map your domain .You may read it here.
Though If you buy both hosting & domain name with hostpad.org then you don’t need to do anything to map your domain.Hostpad.org automatic setting will do domain mapping for you.
Installation of wordpress:
When you have registered with the web host you found that your web host sent some information like server ip, server addresses , control panel login url, control panel(most of the case cpanel*1) user id password.
1*)Many web host provides cpanel as their control panel because it’s a powerful linux control panel, though it’s not mandatory that you must have cpanel web hosting but it’s recommended.
Follow the step to install wordpress:
Step 1=> Go to your control panel url & login with credential given to you during sign up.
In my case hostpad provides cpanel , we are logging in to cpanel.In capnel we found many icon.See in the pic below
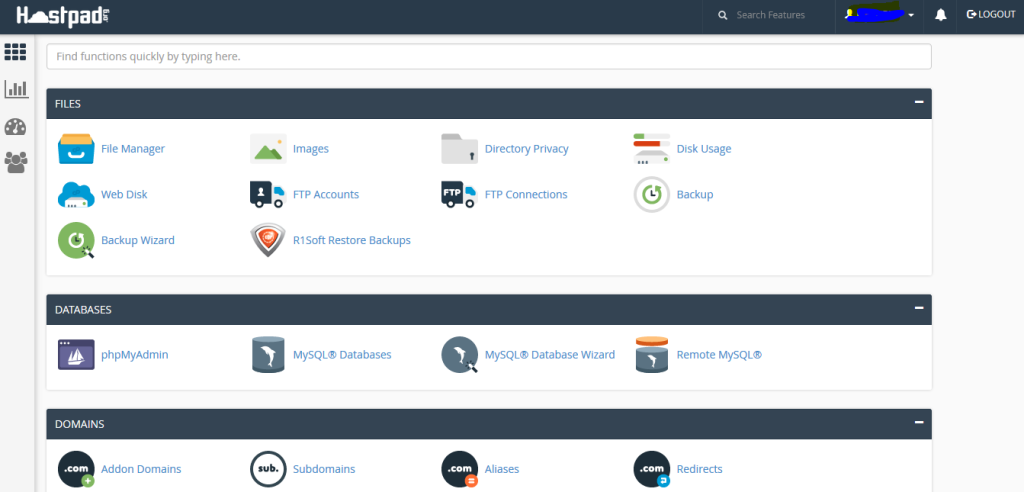
Step2=>Navigate to SOFTACULOUS apps installer & click on the link. Different web host provides different auto installer software.Hostpad.org provides softaculous apps installer.
Once you clicked on that link you will find a control panel looks like below image
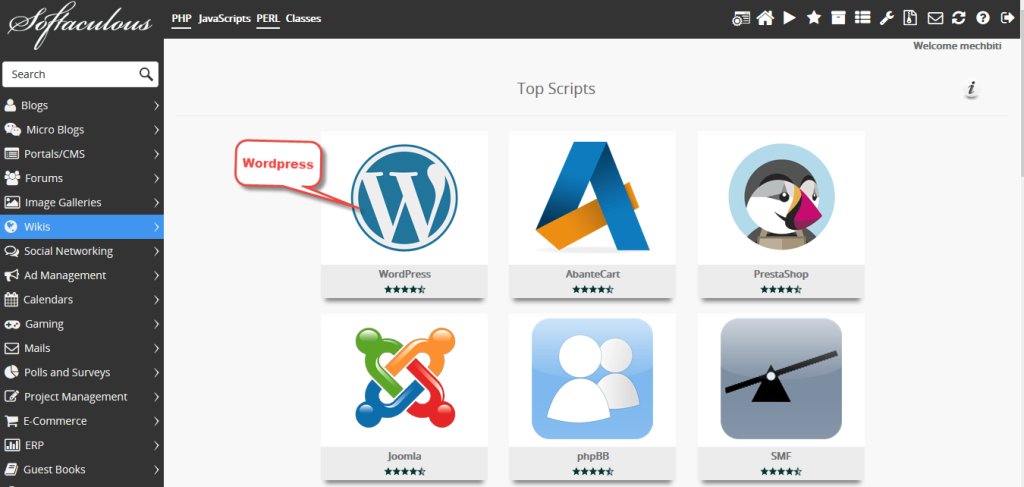
Click on wordpress=>Click to install
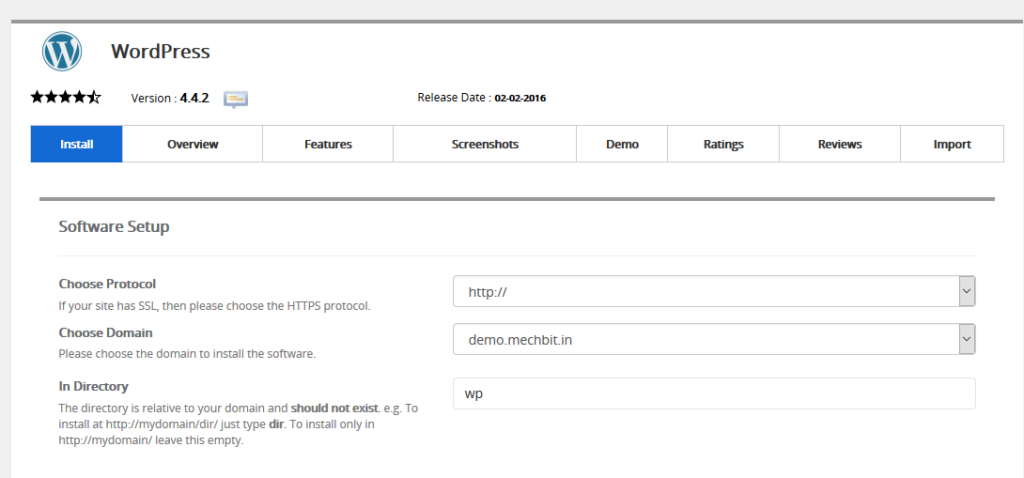
Now Provide the following details :
Choose Protocol:
i) http://www if you would like your website be accessed from http://www.example.com
ii) http:// if you would like your website be accessed from http://example.com
iii)https://www if you would like your website be accessed from https://www.example.com
If you have a ssl certificate installed on your domain then chose this.Otherwise leave it.
iv)https:// if you would like your website be accessed from https://example.com
If you have a ssl certificate installed on your domain then chose this.Otherwise leave it.
Note:Hostpad.org giving free ssl with all hosting plan.
Choose Domain:
Choose your domain from drop down list.you may choose a sub domain too.Here i am choosing a subdomain
In Directory:
This is the directory where you would like your website be installed.If you would like your website be accessed from http://www.example.com then leave this blank.In my example i am installing wordpress in wp directory.
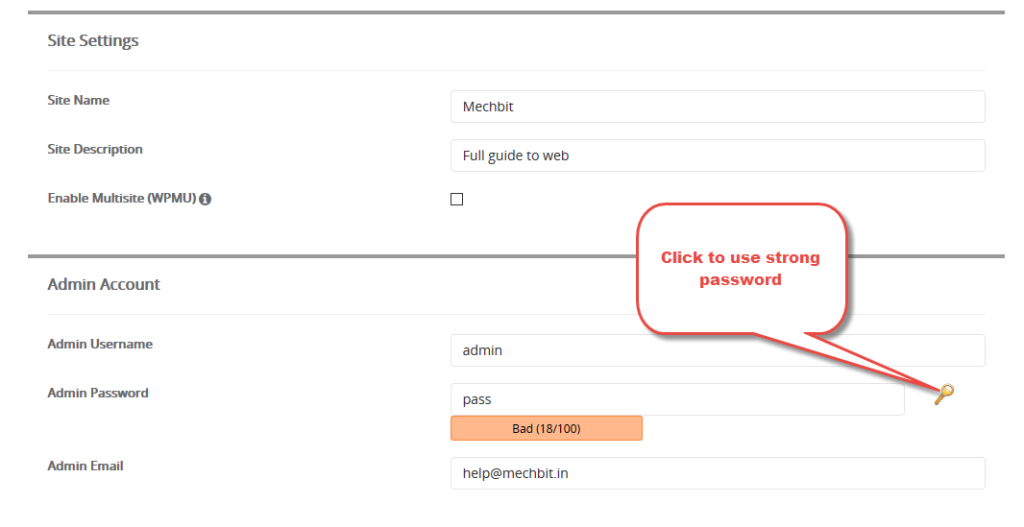
Now click on install.You have to wait for few second after that.
WordPress has been installed in your server .A message will confirm that just like below:
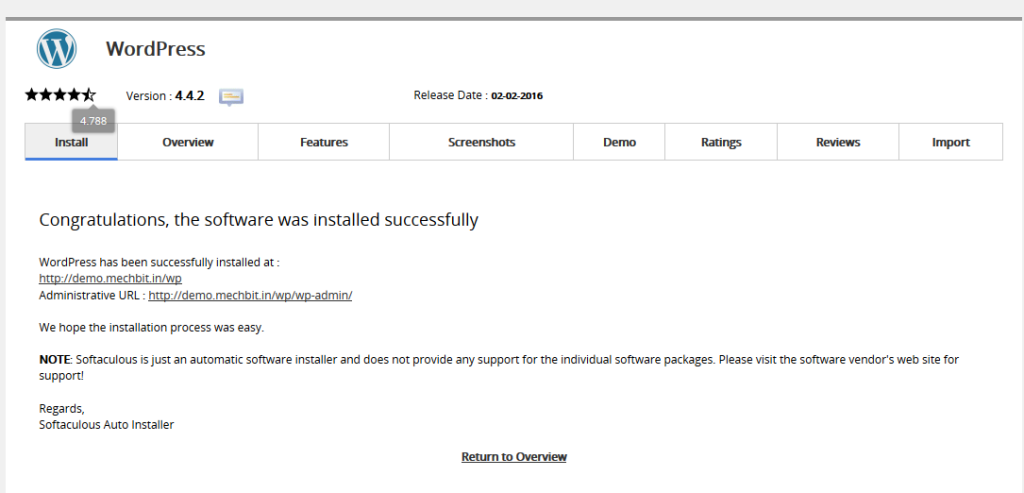
Once you installed wordpress, your website is live.
Now you may login to your website control panel.
Just see the demo of my website: Demo
You can customize this website with documentation here. After customization your website will look like this.
Look at the article, to built my demo website i haven’t used a single line of coding.You can do the same.
You have learned a lot today.Now start exploring with hostpad.org.
0 Comments